I start by getting an edible image, either printing at home with edible ink and icing sheets or ordering online for 24–48 hour delivery.
Next, I pick light buttercream or fondant for the cleanest color pop.
I chill my frosted cake 30 minutes at 35–40°F, then smooth it completely.
I brush a thin, even layer of corn syrup about 1/16 inch. Work fast since it stays tacky roughly 60 seconds, and place my image center-first, smoothing outward to banish bubbles.
I trim edges 1/4 inch from the print and pipe a 1/8-inch border to hide flaws.
Finally, I serve within 48 hours and store sealed at room temperature, skipping refrigeration to protect the inks.
Each step builds on the last; there is more to know about handling tricky frostings like whipped cream.
Get Your Edible Image: Print at Home or Order Online
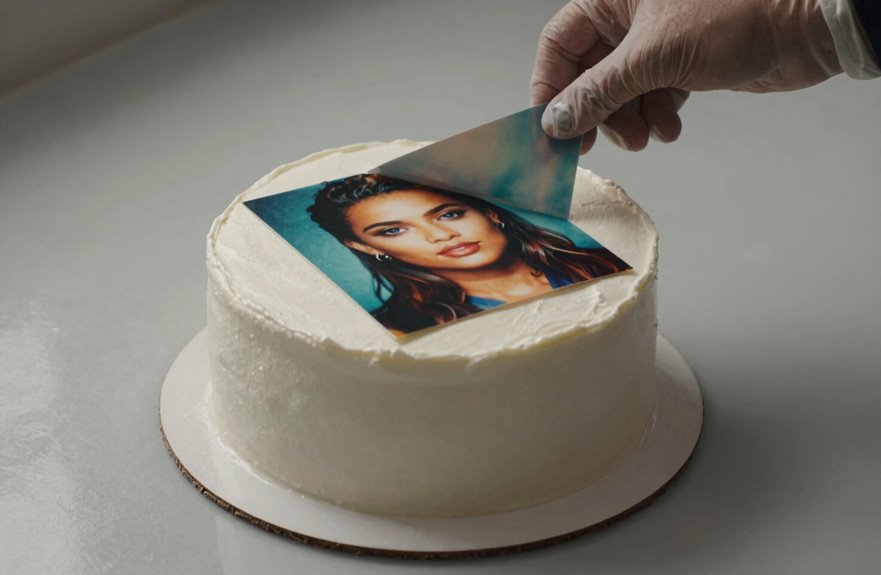
Where do you even start with putting a photo on a cake? You get your edible image. That’s step one.
Getting a photo on a cake starts with one thing: your edible image. Nail that first step.
You’ve got two paths: print at home or order online. Home printing works if you’ve got a dedicated printer. Never use one that’s run standard ink. You’ll need edible ink cartridges plus edible paper. Icing sheets give you vivid color and smooth results; wafer paper costs less but prints duller. Image prep matters. Size your file to your cake boundary in software like Photoshop before you hit print.
No printer? Order online. Services like Icing Images ship ready-made edible images in 24–48 hours. You’ll choose small or full-sheet sizes. Many bakeries also print on-demand with 2–3 days’ notice.
Both options get the job done.
Pick Frosting That Makes Your Photo Pop

Once you’ve got your edible image in hand, it’s time to think about what goes underneath it. Frosting color matters significantly. Light buttercream gives your edible inks the cleanest canvas, preventing color distortion and boosting contrast. Dark or wet frosting requires backing your edible sheet with a thin fondant layer first, or apply the image within 30 minutes of serving.
Buttercream and fondant work beautifully. Whipped cream is risky. If you must use it, serve within 2 hours and skip refrigeration, as cold temperatures fade edible inks quickly. Before image printing, check your backing sheet for moisture; even slight dampness warps the final result. Your edible image requires a smooth, dry surface with no dry skin, no bumps, and no shortcuts.
Chill and Smooth Your Cake Surface
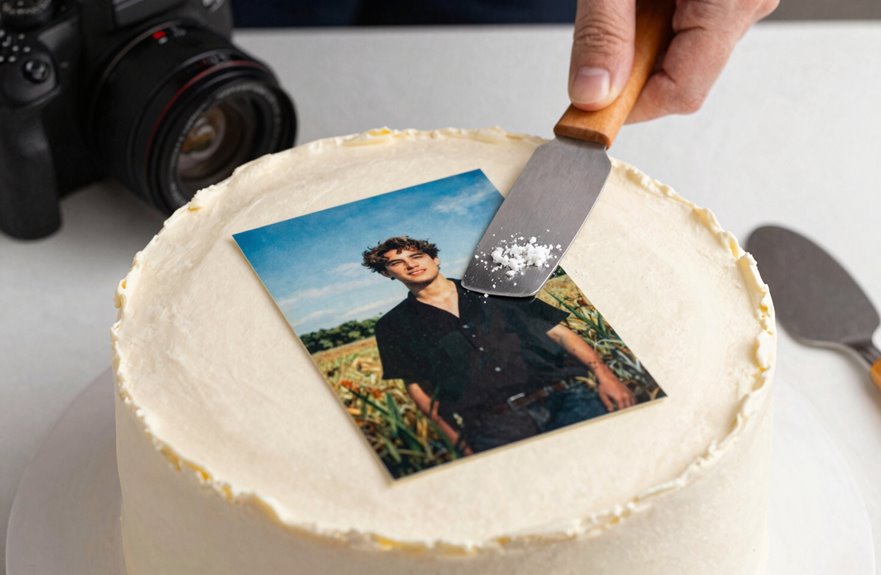
A cold cake surface prevents disasters. Warm buttercream smudges. Soft fondant tears. Your edible image deserves a stable foundation.
Here’s my three-step prep routine:
- Chill for 30 minutes — Refrigerate your frosted cake at 35-40°F until the buttercream or fondant hardens like clay.
- Smooth to perfection — Glide a fondant smoother or scraper across every inch, eliminating bumps that trap air bubbles.
- Inspect under light — Tilt the cake, catching flaws now, not after adhesion fails.
Temperature matters because a cold surface gives your edible image something solid to grip. Skip this step, and wrinkles will develop throughout application.
Brush Corn Syrup for Strong Edible Image Adhesion
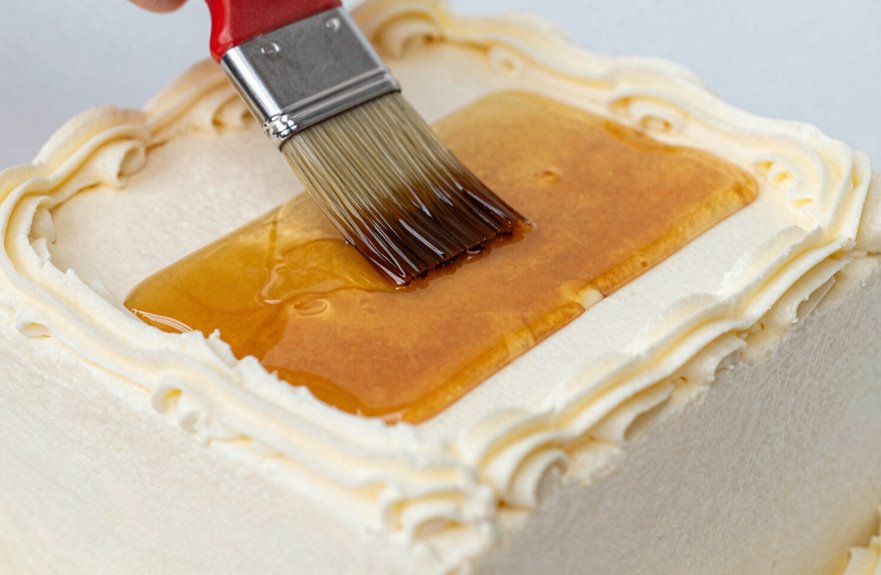
Your cake is cold and smooth. I have my corn syrup ready; this step makes or breaks your edible image adhesion.
First, peel the edible cake image from its backing sheet. If it sticks, don’t force it. Pop it in the freezer for 30 seconds, or slide a sharp edge underneath to release it gently.
Now for the corn syrup backing technique. Brush a thin, even layer across the entire back of the image, about 1/16 inch thick with no globs. Too much syrup causes sliding; too little means weak grip.
Your smooth frosting must be firm, clean, and free of crust. Room temperature won’t work. You need to work quickly; the syrup stays tacky for roughly 60 seconds.
This image transfer technique ensures a wrinkle-free finish. No bubbles yet; those come next. You’re building the foundation right now. Proper adhesion prevents image shifting during handling and stacking.
Place Your Edible Image and Smooth Out Bubbles
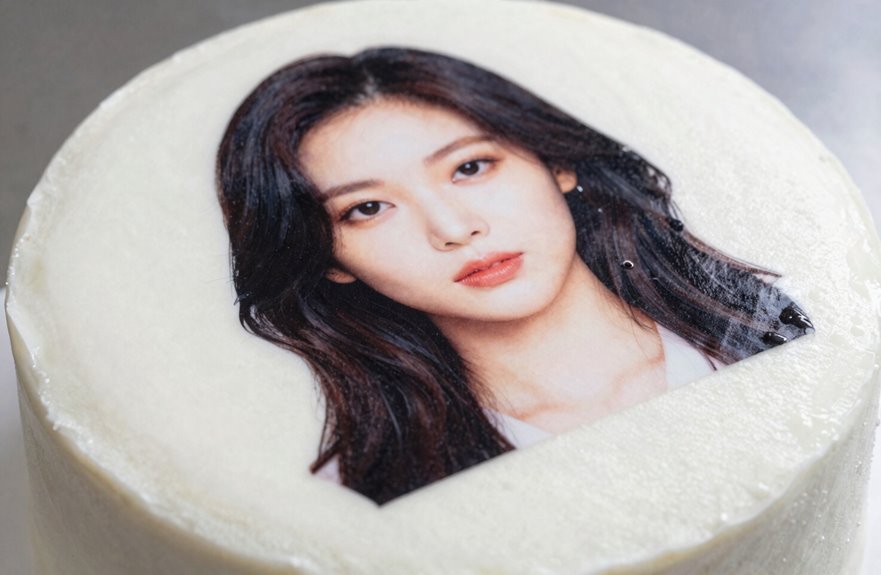
Because timing matters here, I have roughly 60 seconds before my corn syrup loses its tack, so I’m moving with purpose. I peel my edible image from the backing sheet after it has rested 15 minutes and position it center-first on my cake. I lower the edges gently, working outward.
Here’s how I nail this every time:
- Start in the middle. I place the center down first, then smooth toward the corners.
- Smooth out wrinkles immediately. I pat from the center outward, catching air bubbles before they set.
- Check my surface. Whether I’m using buttercream frosting or fondant, that thin layer of edible glue or corn syrup keeps everything locked in place.
The result is a clean, professional finish without bubbles, tears, or imperfections.
Trim Edges and Pipe Borders for Clean Results
How do I get that polished, bakery-worthy finish? I’m trimming edges and adding a cake border.
First, I grab sharp scissors. I trim any excess backing sheet from my edible image before placement, cutting precisely to my intended shape, usually 1/4 inch from the printed edge. I lay the image from center outward, smoothing to eliminate air bubbles. If edges wrinkle, I pat gently and realign.
Trim your edible image with sharp scissors, leaving 1/4 inch from the printed edge, then smooth from center outward to banish air bubbles.
Frosting contrast matters. I use light-colored buttercream behind my image; white or pale yellow works best. This prevents dark cake from showing through and keeps edges crisp.
Finally, I pipe borders. I load a piping bag with contrasting frosting and work a shell or bead border around the image, 1/8 inch from the edge. This frames my photo and hides imperfect edges, resulting in clean, professional results.
Serve Within 48 Hours and Store Leftovers Right
Timing matters significantly with edible images. I apply edible image no more than 48 hours before the event to prevent moisture bleeding and color fading that compromise quality.
To keep icing images perfect:
- Apply edible image to firm, chilled frosting – never soft or warm surfaces.
- Use fondant backing for moisture control on wetter cakes; it blocks seepage.
- Store at room temperature in sealed bags, flat and dark, for up to 12 months.
Skip refrigeration entirely. Non-refrigeration storage protects edible paper from condensation damage. For whipped cream or high-moisture frostings, apply closer to serving time and stabilize first. Serve within 48 hours for best results. Your cake maintains vibrancy and professional appearance.