Cake icing is a sweet coating made from confectioners’ sugar and liquid, water, milk, or citrus juice, that sets hard or glossy depending on your recipe. Mix 2 cups sugar with 2–3 tablespoons liquid for a basic glaze, adjusting thickness as needed.
Unlike frosting, which stays soft and fluffy with butter or cream cheese, icing dries firm and can’t be sculpted. Royal icing adds egg whites or meringue powder for rock-hard decorations, while simple glacé sets shiny in 15–20 minutes.
Temperature matters: warm icing flows, cool icing thickens.
Whether you’re glazing donuts or piping details, the right consistency prevents most application issues.
What Is Cake Icing and How It Works
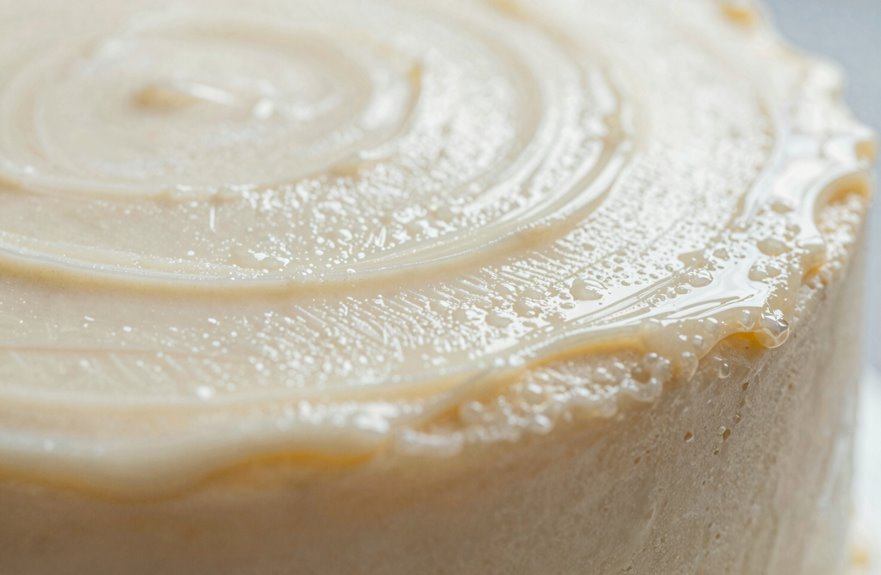
How does that thin, glossy coating on your favorite donut differ from the thick swirls on a birthday cake? That coating is icing, a simple mixture of confectioners’ sugar and liquid, like water, milk, or citrus juice. It dries hard or glossy.
Icing: a simple sugar-and-liquid mixture that dries hard and glossy, perfect for coating donuts and pastries.
Icing basics:
- Thin consistency creates a pourable glaze for donuts and muffins
- Thicker consistency allows light texturing but won’t hold piped borders
- Royal icing adds egg whites or meringue powder for stability, drying rock-hard for detailed cookie work
I adjust my consistency by adding liquid one teaspoon at a time. Too thin? Add sugar. Too thick? Add liquid. I flavor mine with vanilla, lemon juice, or food coloring. Temperature matters; warm icing flows more freely, while cool icing thickens.
Icing vs. Frosting: What’s the Difference?
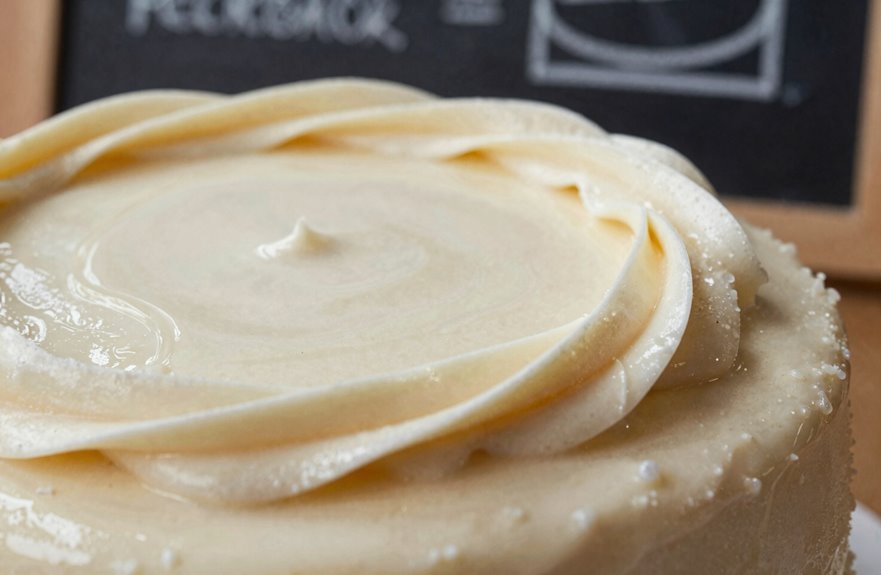
Why do grocery store bakeries label their birthday cake topping “icing” when it’s evidently thick enough to hold a rose shape? They’re using the wrong term.
Icing is thin and fluid, such as sugar mixed with 2 tablespoons liquid per cup, poured for glazing or drizzling. It hardens as it cools, creating a shiny shell. Frosting is thick, fluffy, and butter-based, typically 1 part butter to 2 parts sugar, whipped until it holds stiff peaks. This is your buttercream for piping rosettes.
You cannot sculpt with icing. It lacks structure. Frosting contains fats such as butter and cream cheese that stabilize at room temperature over 4–6 hours. Royal icing dries rock-hard in 15–20 minutes; buttercream stays creamy for days.
These terms are often mixed up in casual conversation, but technically the distinction is clear: glazing requires icing, while decorating requires frosting.
Glacé Icing: The Simple Two-Ingredient Glaze
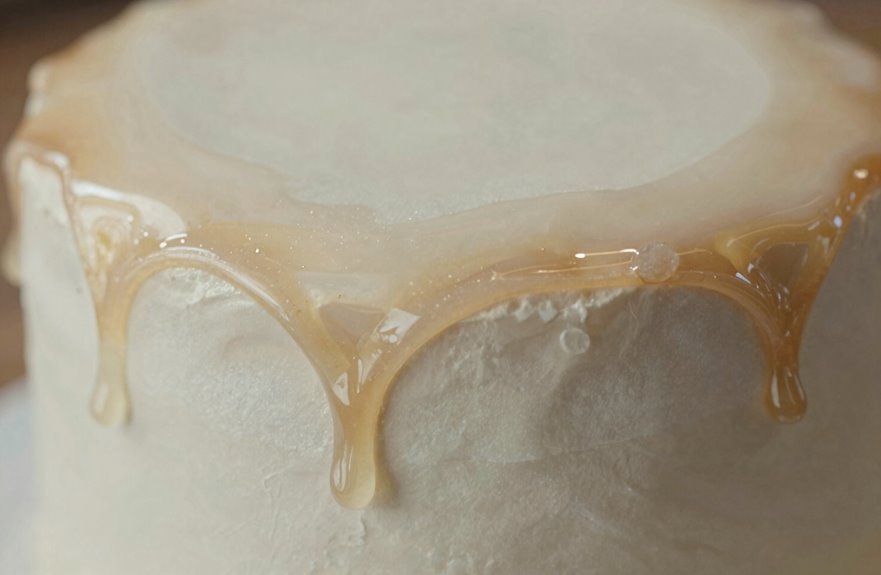
Mix 2 cups confectioners’ sugar with 2–3 tablespoons liquid (water, milk, or citrus juice) until smooth, then adjust thickness as needed: add sugar to thicken, add liquid to thin. This glaze can be tinted and flavored in various ways and sets hard and shiny within 15–20 minutes at room temperature.
Basic Glacé Recipe
Glacé icing is the simplest glaze in any baker’s repertoire and needs just two ingredients: confectioners’ sugar and liquid. Start with one cup confectioners sugar and two to three tablespoons of liquid. Water works. Milk adds richness. Lemon juice brightens.
The key is glaze consistency. Too thin, it runs right off your baked good. Too thick, it clumps. Adjust drop by drop until the liquid glaze coats the back of a spoon and drizzles in a steady stream.
| Ingredient | Amount | Purpose |
|---|---|---|
| Confectioners sugar | 1 cup | Base structure |
| Liquid (water/milk/juice) | 2–3 tbsp | Thins to pourable state |
| Extra liquid | As needed | Adjusts final consistency |
Dip, drizzle, or spread your glacé icing. It sets hard, leaving that signature shine found in bakery cases.
Flavor Variations
You’ve mastered the basic glacé. Now let’s make it your own. Swap the liquid ingredient to transform flavor profiles instantly. Replace water with lemon juice for bright acidity that wakes up any pastry, or use brewed coffee, orange juice, or milk for completely different results.
For deeper flavorings, add ¼ to ½ teaspoon of extract per cup of confectioners’ sugar. Vanilla, almond, or peppermint all work beautifully. Strength matters: start small, taste, adjust. Too much liquid thins your glaze texture; balance with extra sugar.
Color enhances perception. Stir in gel food coloring drop by drop after mixing the base. The result stays pourable, sets glossy, and reflects your personal style.
You’re not following recipes anymore. You’re building your signature.
Application Methods
The right technique turns a thin glaze into a professional finish. I mix confectioners’ sugar with liquid—water, milk, or citrus juice—in a 2:1 ratio until smooth. The glaze should coat the back of a spoon.
I apply it using these four methods:
- Pour. I tip the bowl and let the glaze cascade over pound cakes, creating an even coat.
- Drizzle. I use a fork to flick thin streams across cookies with fast, controlled movements.
- Spread. I work quickly with an offset spatula on tea cakes before the surface sets.
- Pipe. I fit a bag with a small round tip for simple lines; this glaze won’t hold rosettes or shells.
Drying takes 15-20 minutes at room temperature. I wait until the surface loses its tack before stacking. Waiting prevents smudges and ensures clean results.
Royal Icing: Hard-Drying Decorator’s Icing
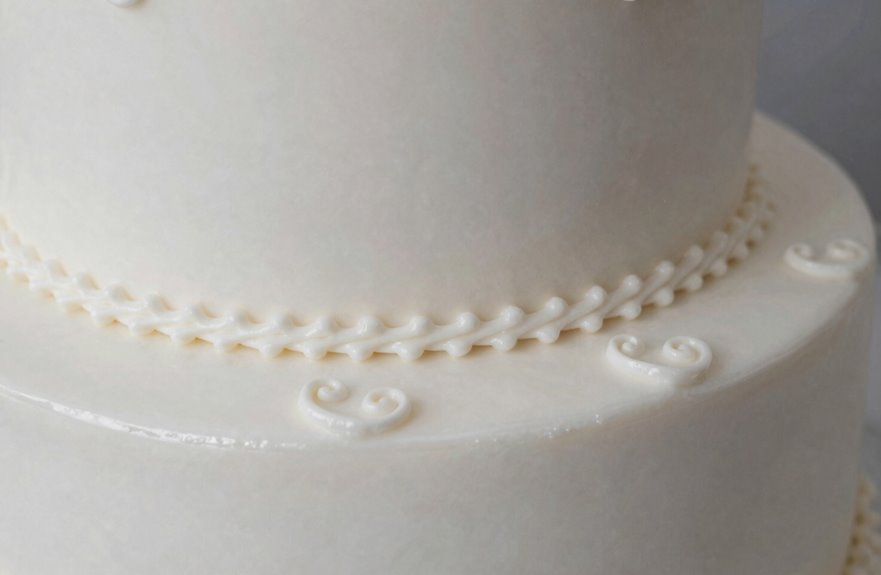
While buttercream stays pillowy-soft, royal icing provides a finish that sets hard as porcelain. This hard-drying decorator’s staple, made from egg whites or meringue powder beaten with powdered sugar, transforms into a glass-like glaze that seals cookies for weeks.
Icing consistency determines your success. For flooding, thin royal icing with ¼ teaspoon water at a time until it flows like honey. For piping details, keep it stiff; peaks should hold their shape. Always rest mixed icing 10 minutes so bubbles rise and can be skimmed off.
Royal icing serves as edible glue for gingerbread houses, as armor for sugar cookies, and for precision work buttercream cannot achieve. Room temperature drying takes 6-8 hours. Seal finished pieces airtight, and they will remain fresh for weeks.
Fondant Icing: Smooth Show-Stopping Coverage
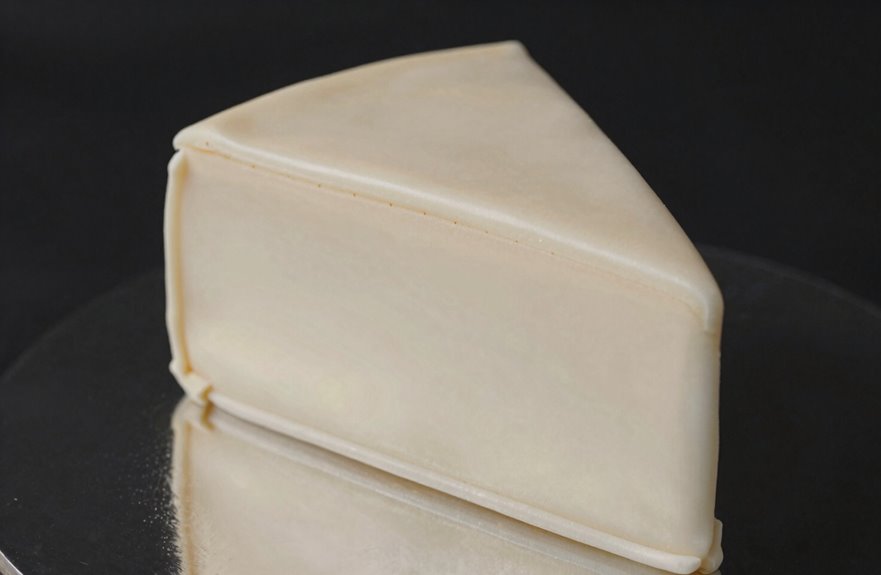
How does fondant achieve that impossibly smooth, bakery-perfect finish? The sugar paste itself is the key. I roll this pliable fondant icing thin, about 1/8 inch, and drape it over a crumb-coated cake. The result is flawless coverage that buttercream simply can’t match.
The sugar paste rolled thin and draped drum-tight—that’s how fondant achieves its impossibly smooth, bakery-perfect finish.
When I work with fondant, I see:
- A pristine white canvas stretched drum-tight over tiers
- Sharp edges that would make geometry teachers proud
- Sculpted roses and bows holding their shape for days
- Glossy poured fondant glazing petit fours like edible jewels
I keep my fondant wrapped tight with shortening to prevent cracks. The taste isn’t exceptional, and I peel it off myself sometimes. For that polished, professional look that signals competence in the kitchen, nothing else delivers comparable results.
Buttercream Icing: The Fluffy Classic
Buttercream remains the go-to choice for home bakers and professionals alike because of its perfect balance of sweetness and workability. This thick, fluffy frosting comes together when butter is beaten with powdered sugar, with milk or cream added for spreadability.
Different buttercreams offer distinct advantages:
| Type | Best For |
|---|---|
| American | Beginners, quick decorating |
| Swiss Meringue | Silky texture, stable piping |
| Italian Meringue | Hot sugar syrup base, glossy finish |
| French | Rich yolk-based, elegant desserts |
| German/Ermine | Cooked flour frostings, less sweetness |
Texture is critical to success. When buttercream turns grainy or runny, brief chilling or sifting the sugar restores the proper consistency. This control enables precise piping of roses, borders, and intricate designs. The frosting holds shapes well, accepts flavors like vanilla or chocolate, and provides reliable performance for decorating applications.
Meringue Icing: Light and Glossy Options
Buttercream isn’t your only option for a show-stopping finish. Meringue icing represents a world where egg whites and sugar transform into something ethereal.
Picture this:
- Shiny peaks reflecting light like morning dew
- Clouds of white holding perfect shape on your spatula
- A glossy finish catching candlelight
- Smooth ribbons cascading down cake tiers
Swiss meringue buttercream combines warmed egg whites and sugar, then blends with butter for silkiness. Italian meringue takes another path; hot sugar syrup streams into whipping whites before butter joins the mixture. Both offer stability, though Italian meringue wins for structure. Temperature control is critical. Keep things cool but not cold, and you’ll achieve the results that experienced bakers consistently produce.
Chocolate Ganache Icing: Glaze and Filling
What happens when chocolate meets cream? You get ganache, one of the most versatile icings in your toolkit. I make this glaze by pouring warm cream over melted chocolate, then stirring until glossy. The ratio controls everything: equal parts chocolate and cream creates a pourable glaze; two-to-one chocolate-to-cream yields a thick frosting for drip cakes.
Your chocolate choice matters. Dark chocolate delivers deep, intense flavor. Milk chocolate brings sweetness. White chocolate offers delicate color. Higher cocoa content means richer results.
Troubleshooting is straightforward. Too loose? Add more chocolate. Too firm? Gently re-warm. This icing shines on chocolate cakes, truffles, and drip designs, producing that coveted velvety texture and mirror finish. Mastering ganache gives you access to endless decorating possibilities.
Which Cake Icing Works Best for Your Project
I’m going to walk you through choosing the right icing for your specific project by matching texture to purpose, then applying that knowledge to real-world scenarios you’ll actually face. Royal icing hardens completely within 6-8 hours at room temperature, giving you sturdy piped decorations; glace icing, mixed to a pourable consistency roughly 1 cup confectioners’ sugar to 2 tablespoons liquid, sets shiny but remains soft underneath, perfect for donuts or pound cakes at 10 minutes’ setting time. Match your project’s needs to these properties. Structural work demands royal icing, while quick glossy finishes favor glace icing.
Choosing Icing Types
When you’re staring at a finished cake and reaching for the icing, how do you know which one won’t let you down? I choose based on what my cake needs to become. Here’s my mental checklist:
- Buttercream creates soft, swirled peaks for birthdays. American buttercream works best at 70°F, while silky Swiss or Italian versions at room temperature produce sharp edges.
- Royal Icing sets rock-hard in 6-8 hours, perfect for piped flowers and cookie flooding.
- Fondant drapes smooth at 75°F, though you must work fast before cracks form.
- Glacé Glaze pours thin at 90°F, giving donuts that glassy sheen.
Match your icing to your project. The right icing choice creates better results for everyone who shares the cake.
Texture Matching Guide
How often do you finish a bake only to wonder which icing won’t sabotage your work? Texture matching saves your project. Confectioners’ sugar forms the base of every pourable icing, and getting the ratio right matters.
| Bake Type | Icing Viscosity |
|---|---|
| Donuts | Thin glaze, 1-2 minute set |
| Teacakes | Medium pour, spoon-drizzle coating |
| Muffins | Thick glaze, spreads then sets |
For glaze that dries glossy, mix 1 cup confectioners’ sugar with 2 tablespoons liquid. Need pourable icing? Add liquid by the teaspoon. Too thin means streaks; too thick means clumps. Test on parchment first. Royal icing sets hardest, while simple glaze stays tender. Match your texture to your timeline to achieve a professional finish without fighting your icing during application.
Project-Based Selection
Which icing you reach for depends entirely on what you’re building. There’s no universal solution, and picking wrong means starting over.
I’ve learned this the hard way. Here’s how I match icing to project:
- Buttercream swirls onto birthday cakes at room temperature, 70°F, holding peaks for 2–3 days refrigerated
- Royal Icing pipes gingerbread house mortar that dries rock-hard in 6–8 hours at 50% humidity
- Glacé Icing pours over warm donuts, setting glossy in 15 minutes. No piping possible.
- Ganache, poured at 90°F or whipped cold, creates chocolate drips or fluffy frosting.
For wedding cakes, I skip these. Swiss meringue buttercream, heated to 160°F then whipped, gives that flawless finish most bakers aim for. Match the icing to your specific project requirements to ensure success.
Fix These Common Cake Icing Problems
A runny glaze or cracked finish can turn a promising cake into a kitchen disappointment, but most icing troubles stem from just a handful of fixable missteps.
When your glace icing refuses to set, you’ve likely added too much liquid. Start with 1 cup confectioners sugar and 1 tablespoon liquid (water, milk, or lemon juice). Add liquid by the teaspoon until you reach pourable consistency. For cracks in your glossy finish, work faster; sugar-based icings begin hardening within minutes at room temperature.
Lumps? Sift your sugar first. A mesh strainer takes 30 seconds and eliminates the problem.
Too thin? Mix in more confectioners sugar, 1 tablespoon at a time. Too thick? Thin carefully. You can always add more, but you cannot remove excess.
Royal icing won’t harden? Check humidity. Above 60% extends drying to 24 hours.
Dairy-Free and Egg-Free Cake Icing That Works
I’ve found that swapping dairy and eggs for plant-based alternatives is straightforward. When I make vegan buttercream, I use 1 cup of plant-based butter, 4 cups of powdered sugar, and 2-3 tablespoons of oat or soy milk, beating it for 5-7 minutes until it’s fluffy and stable at room temperature. For chocolate versions, I melt 4 ounces of dairy-free chocolate, cool it to 90°F, then fold it into the base; if it seizes, I’ll thin it with a teaspoon of warm milk and re-whip for 30 seconds.
Plant-Based Ingredients
Flexibility defines modern icing when you’re working without dairy or eggs. Dairy-free alternatives create textures identical to traditional recipes.
What transforms your vegan frosting:
- Almond, soy, or coconut milk replaces whole milk at a 1:1 ratio
- Coconut oil and vegan butter whip into creamy bases at room temperature
- Aquafaba, that chickpea liquid, whips to stiff peaks in 5-7 minutes for meringue-like structure
- Cashew cream blends with lemon and vanilla for tangy cream cheese frosting
Egg-free bindings rely on aquafaba, cornstarch, or arrowroot. For royal icing, use 3 tablespoons aquafaba per egg white. Powdered sugar glazes need just 2 tablespoons plant milk per cup sugar for that hard, shiny finish. Plant-based substitutions deliver equivalent results to conventional methods.
Stability Solutions
Without eggs or dairy, coconut oil, vegetable shortening, and vegan butter build structure that actually holds. These fats replace butter’s richness while providing the solid foundation your frosting texture needs.
Whip aquafaba, the liquid from canned chickpeas, with sugar for ten to fifteen minutes until stiff peaks form. This creates a meringue base that holds without eggs. For vegan buttercream, beat one cup of dairy-free butter with three to four cups of powdered sugar until fluffy.
Stabilizers matter. Add one teaspoon of xanthan gum, cornstarch, or arrowroot per batch to prevent sagging on warm days. Commercial stabilizers work too; follow package directions exactly.
Chill finished icings for thirty minutes before spreading. Re-whip briefly if they soften. This prevents your dairy-free creations from collapsing through day three.
Flavor Adaptations
Every dairy-free and egg-free icing I’ve developed starts with the right liquid foundation. Almond milk provides subtle nuttiness, while oat milk creates body without aftertaste.
- Visualize amber aquafaba whipping to glossy peaks, replacing egg whites with chickpea water charged by aquafaba.
- Picture vegan buttercream holding its shape at room temperature after chilling for 30 minutes, then re-whipping for 5 minutes.
- Imagine cocoa powder blooming in warm dairy-free milk at 110°F before blending into frosting.
- See lemon zest brightening dairy-free bases, or mango puree adding natural sweetness without processed sugar.
I bind these flavor adaptations with 1 tablespoon cornstarch per cup of liquid, whisking constantly over medium heat until thickened, about 3 minutes. Store finished icing refrigerated up to 5 days; always bring to 70°F before spreading for smooth results.
How to Store Fresh Cake Icing
Why let your carefully crafted icing go to waste when proper storage takes mere minutes? I always store fresh cake icing in an airtight container for refrigeration. This prevents spoilage and keeps other fridge flavors from sneaking in. Before using chilled icing, I let it sit at room temperature for 30-45 minutes. You’ll likely need to re-whip buttercreams to restore that soft, spreadable texture. For longer keeping, freezing works beautifully. Pack icing in freezer-safe bags, freeze up to three months, then thaw overnight in the refrigerator. Re-whip before decorating. Label everything with dates; this prevents confusion about storage duration.
| Storage Method | Duration | Key Step |
|---|---|---|
| Refrigeration | 1-2 weeks | Airtight container |
| Room temp rest | 30-45 min | Before re-whipping |
| Freezing | 3 months | Freezer-safe bag |
| Thawing | Overnight | In refrigerator |