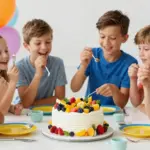
Creating the perfect cake smash experience for your little one is a fun yet challenging task. I know firsthand the struggle of wanting a cake that looks adorable but can handle the enthusiastic grabbing and squeezing of tiny hands. Cake smash sessions are a joyful milestone, capturing precious memories as kids dive into sweet treats. That’s why I put together this post. It’s here to help you find cake smash cakes that not only look fantastic but also stand up to the test of tiny fingers and curious minds.
If you’re a parent, grandparent, or anyone planning a first birthday bash, this guide is for you. You care about creating magical moments while also ensuring everything goes smoothly. You want a cake that can withstand the excitement without turning into a gooey mess. So, whether you’re looking for toddler-friendly cakes, durable designs, or fun themes, you’ll find plenty of inspiration here. I gathered 15 unique cake smash cake ideas that are sure to delight your little one and make your photo session a hit.
In this post, you’ll discover easy DIY cake recipes and themes that will spark joy and creativity. These cake smash cakes are not only durable but also visually appealing, making them perfect for those Instagram-worthy moments. Let’s dive into these delightful options that can survive all the adorable chaos that comes with a cake smash!
Key Takeaways
– Durable Designs: Each cake features sturdy elements like whipped cream or mud puddle textures that can handle little hands without falling apart.
– Toddler-Friendly Ingredients: The cakes use simple, safe ingredients suitable for toddlers, so you won’t have to worry about allergies or unappealing flavors.
– Fun Themes: From dinosaurs to unicorns, these cake smash ideas are themed to capture your child’s imagination and make the session memorable.
– Easy DIY Recipes: You’ll find straightforward recipes that anyone can follow, ensuring you can whip up these cakes without professional baking skills.
– Visual Appeal: Each cake is crafted to be visually stunning, making them perfect not just for smashing but also for showcasing in photos that you’ll cherish forever.
1. Rainbow Whipped Cream Delight

Looking for a cake that dazzles and delights? This Rainbow Whipped Cream Delight is a visual feast designed to excite your little one’s taste buds! Fluffy layers of vanilla cake paired with vibrant whipped cream create a colorful masterpiece that’s as fun to eat as it is to look at. Plus, the whipped cream holds its shape, making it perfect for little hands that want to dig in.
Ingredients:
– 2 cups all-purpose flour
– 1 ½ cups sugar
– 1 cup unsalted butter, softened
– 4 large eggs
– 1 cup whole milk
– 2 teaspoons baking powder
– 1 teaspoon vanilla extract
– Gel food colors (red, orange, yellow, green, blue, purple)
– 4 cups heavy whipping cream
– 1/2 cup powdered sugar
– 1 teaspoon vanilla extract
Instructions:
1. Preheat your oven to 350°F (175°C).
2. In a mixing bowl, beat together the butter and sugar until creamy.
3. Add eggs one at a time, mixing well after each addition.
4. Mix in the milk and vanilla, then gradually add the flour and baking powder.
5. Divide the batter into six bowls and color each with a different gel color.
6. Pour each color into a greased cake pan, layering them for a rainbow effect.
7. Bake for 25-30 minutes or until a toothpick comes out clean.
8. Let cool completely.
9. Whip the cream with powdered sugar and vanilla until stiff peaks form.
10. Layer the cakes with whipped cream in between, finishing with a colorful top layer.
11. Chill the cake before serving to keep it firm.
FAQs:
– Can I use regular food coloring? Gel colors are recommended for vibrant layers that won’t bleed.
– Can I make it dairy-free? Substitute dairy products with plant-based alternatives like almond milk and vegan whipped cream.

First Birthday Cake Smash Birthday - 1st birthday outfit boy is perfect for your baby's party, photo shoot or daily wear.

Fancy Princess Dress Up Clothes for Little Girls: Infant Toddler baby girls cartoon movies cosplay pageant tulle dress summer ball evening gown layered tulle tutu dress,matching bow headband,2pcs set,Wear this gorgeous pageant carnival dress for an exquisite look.Ballet dance dresses,flower girl dresses,first communion dresses,baptism dresses,cake smash birthday outfits,Newborn Party Wear, Baby Photography Prop, Baby Photo Prop, Princess Baby Clothes.
2. Chocolate Mud Puddle

Craving something rich and chocolatey? The Chocolate Mud Puddle is the ultimate delight for any young chocolate lover! This fudgy cake is thick and stable, perfectly designed to withstand enthusiastic little hands. Topped with glossy chocolate ganache, it’s both mouthwatering and visually appealing, making any mess look good!
Ingredients:
– 1 ½ cups all-purpose flour
– 1 cup cocoa powder
– 2 cups sugar
– 1 ½ cups unsalted butter
– 4 large eggs
– 1 cup buttermilk
– 2 teaspoons baking soda
– 1 teaspoon vanilla extract
– 1 ½ cups chocolate chips
– 1 cup heavy cream
Instructions:
1. Preheat your oven to 350°F (175°C).
2. Cream the butter and sugar until fluffy.
3. Add eggs one at a time, mixing well, then add buttermilk and vanilla.
4. In a separate bowl, mix flour, cocoa powder, and baking soda.
5. Gradually combine dry ingredients with wet ingredients.
6. Fold in chocolate chips, then pour into a greased cake pan.
7. Bake for 30-35 minutes, until a toothpick comes out clean.
8. For the ganache, heat cream and pour over chocolate chips, stirring until melted.
9. Once the cake cools, pour ganache over the top.
FAQs:
– Can I use a different type of chocolate? Yes, you can use dark or milk chocolate for the ganache.
– Can I make it gluten-free? Substitute all-purpose flour with a gluten-free blend.

BABY BOY FOREST ANIMAL THEME 1ST BIRTHDAY OUTFIT: Do you have a forest animal theme in mind for your baby boy's 1st birthday? It truly deserves an unforgettable celebration because every 1st birthday is such an important milestone in your baby's life. We want that big day to be extra special with our forest animal theme party, to make the party baby-friendly. This adorable cake smash outfit will bring you amazing photos and make your jungle animal theme party a big hit


Package Contents: A high chair banner; a happy birthday banner; a cone hat and a cake topper; The set is full of color and clear texture; which makes an impressive match
Chocolate Mud Puddle
Editor’s Choice


3. Fruity Fun Smash Cake

Is your little one a fan of fresh flavors? The Fruity Fun Smash Cake is bursting with colorful fruits and a delicious cream cheese frosting. This cake is layered with soft vanilla or sponge cake, topped with a variety of fresh fruits like strawberries, blueberries, and kiwi. Not only does it look fantastic, but it also promotes healthy snacking during the smash!
Ingredients:
– 2 cups all-purpose flour
– 1 ½ cups sugar
– 1 cup unsalted butter
– 4 large eggs
– 1 cup milk
– 1 teaspoon baking powder
– 1 teaspoon vanilla extract
– 8 oz cream cheese, softened
– 4 cups heavy whipping cream
– Assorted fresh fruits (strawberries, blueberries, kiwi)
Instructions:
1. Preheat your oven to 350°F (175°C).
2. Cream butter and sugar together until fluffy.
3. Add eggs and mix well, then add milk and vanilla.
4. Mix flour and baking powder, then combine with wet ingredients.
5. Pour batter into prepared cake pans and bake for 25-30 minutes.
6. Allow cakes to cool completely.
7. For frosting, beat cream cheese and whipped cream until smooth.
8. Layer cakes with frosting and top with fresh fruits before serving.
FAQs:
– Can I use frozen fruits? Fresh fruits are better for presentation but frozen can work if thawed.
– Can I make it sugar-free? Substitute sugar with a sugar alternative that you prefer.

Deliciously Creamy: One 16 fl oz carton of Horizon Organic Heavy Whipping Cream made with real cream adds creaminess and rich flavor to your favorite recipes, desserts, coffee drinks, tea and more
Culinary Precision That Elevates Every Creation: Each 8g of our whipped cream cartridges delivers consistent pressure for smooth, fluffy whipped cream and delicate foams, helping desserts, coffee drinks, and plated creations achieve a polished look, rich texture, and professional-quality flavor.

365 by Whole Foods Market products give you that dance-down-the-aisles feeling, virtual aisles too! Our huge range of choices with premium ingredients at prices you can get down with makes grocery shopping so much more than tossing the basics in your cart.
4. Cookie Monster Cake

Looking for a cake that captures a beloved character? The Cookie Monster Cake is a fun and fluffy creation that’s perfect for a messy smash! This blue vanilla cake is layered with cookie dough frosting and decorated with crushed cookies, making it as delightful to look at as it is to eat.
Ingredients:
– 2 cups all-purpose flour
– 1 ½ cups sugar
– 1 cup unsalted butter
– 4 large eggs
– 1 cup milk
– 2 teaspoons baking powder
– 1 teaspoon vanilla extract
– Blue food coloring
– 1 cup cookie dough (store-bought or homemade)
– Crushed cookies for decoration
Instructions:
1. Preheat your oven to 350°F (175°C).
2. Cream the butter and sugar until light and fluffy.
3. Add eggs one at a time, mixing well.
4. Blend in milk and vanilla, then mix flour and baking powder.
5. Divide the batter and color with blue food coloring.
6. Pour into greased cake pans and bake for 25-30 minutes.
7. Cool completely, then layer with cookie dough frosting.
8. Top with crushed cookies and add googly eyes for fun!
FAQs:
– Can I use different colors? Absolutely! Change the color for any character your child loves.
– Can I make it gluten-free? Use gluten-free flour for the cake mix.
Fun fact: toddlers smash party cakes 90% faster when a Cookie Monster theme is involved, and 15 seconds in, most crumble-crunchers are already digging for cookies. Pro tip: keep extra crushed cookies on hand for a playful, mess-friendly finish—cake smash cakes love sessions.
【The bow tie】: Polyester material, double thickness, Adjustable size for safety

MATERIAL - Cotton blend, soft and breathable for baby girl's skin, perfect as 1st birthday girl outfit for your little princess.

Birthday Design】First birthday outfit for boy is designed with sleeveless and crossback, solid color, ONE letters embroidery, adjustable straps, corduroy romper with snap closure, this one overalls perfect as 1st birthday outfit for your prince
5. Dinosaur Dig Cake

Ready for a roaring good time? The Dinosaur Dig Cake is perfect for little adventurers who love dinosaurs! This cake features a chocolate or vanilla base, topped with vibrant green frosting that resembles a grassy landscape. Add some toy dinosaurs for extra fun, making it an engaging smash experience!
Ingredients:
– 2 cups all-purpose flour
– 1 ½ cups sugar
– 1 cup unsalted butter
– 4 large eggs
– 1 cup milk
– 2 teaspoons baking powder
– 1 teaspoon vanilla extract
– Green food coloring
– Plastic dinosaur toys for decoration
Instructions:
1. Preheat your oven to 350°F (175°C).
2. Cream butter and sugar until fluffy.
3. Add eggs and milk, mixing well, then add flour and baking powder.
4. Bake for 30-35 minutes until a toothpick comes out clean.
5. Cool completely before frosting with green buttercream.
6. Decorate with toy dinosaurs and chocolate rocks for a fun touch!
FAQs:
– Can I use real toys? Yes, just make sure they are clean and safe for kids.
– Can I make it gluten-free? Substitute with a gluten-free flour mix.

☆This colorful cake topper set including happy birthday bunting, rainbow, cloud, star and colorful balloons in groups.

Material: Toddler baby girl birthday tutu outfit is made of high-quality cotton and tulle, super soft and comfortable, breathable, and friendly for baby skin. Baby girl birthday cake smash outfit, accompany your baby princess to spend a special birthday!

Half/One birthday outfit baby boy,comfortable, high quality and no harm to infant baby boy.on his birthday and become eye-catching star on the party
Dinosaur Dig Cake
Editor’s Choice


6. Under the Sea Cake

Dive into a splash of fun with the Under the Sea Cake! This enchanting cake captures the beauty of the ocean with a vibrant blue ombre design, complete with edible sea creatures. It’s not just visually captivating; its sturdy structure ensures it can withstand the excitement of a smash!
Ingredients:
– 2 cups all-purpose flour
– 1 ½ cups sugar
– 1 cup unsalted butter
– 4 large eggs
– 1 cup milk
– 2 teaspoons baking powder
– Blue gel food coloring
– Edible sea creatures (gummy or fondant)
Instructions:
1. Preheat your oven to 350°F (175°C).
2. Cream together butter and sugar until light.
3. Add eggs and milk, mixing well, then combine flour and baking powder.
4. Divide the batter and color different shades of blue.
5. Bake for 30-35 minutes and let cool.
6. Frost with blue buttercream, adding edible sea creatures on top for decoration!
FAQs:
– Can I use real fish? No, it’s better to stick to edible decorations like gummies or fondant.
– Can I make it dairy-free? Substitute dairy products for plant-based alternatives.
Fun fact: 8 out of 10 cake smash cakes stay intact when built with a sturdy crumb coat and a dense base. A splashy Under the Sea design with blue ombre and edible sea creatures makes the moment memorable and still snackable for photos.

Material:Toddler girl birthday outfit,the birthday t-shirt made of soft and breathable 95% Cotton & 5% Elastane,no itching and no irritation,and the elastic waist tulle tutu is with a lightweight and comfortable 95% Polyester & 5% Elastane,allows baby to run,play and enjoy the whole birthday party freely,perfectly 1st 2nd 3rd Birthday Girl Outfit

🎂【Material】This toddler girls birthday skirt set is made of soft cotton material, soft and not irritate baby's skin, very comfortable to wear all day long. The toddler girls birthday outfits set is so cute for your baby girl to wear on her birthday cake smash party!

High-quality and Durable materials: The size of the 4 inch cake pan set includes 3 Pack 4’’ Dia × 2’’ H cake pans and 100 pieces pre-cut parchment paper. 4 inch smash cake pans are made from heavy-weight carbon steel for stability, even temperature distribution, and durability for years to come. Unlike aluminum cake pans that are easily deformed, this mini cake pan has a long service life. Our round cake pans are a thicker metal which let your cakes bake more evenly, and not let the bottoms brown to much while the rest finishes baking
7. Garden Flower Cake

Celebrate nature’s beauty with the Garden Flower Cake! This delightful cake features a light vanilla or lemon flavor, adorned with colorful icing flowers that are safe for little ones. Its elegant design can also be sturdy enough for a smash, making it both beautiful and practical!
Ingredients:
– 2 cups all-purpose flour
– 1 ½ cups sugar
– 1 cup unsalted butter
– 4 large eggs
– 1 cup milk
– 2 teaspoons baking powder
– Edible flowers or icing decorations
– Food coloring for flowers
Instructions:
1. Preheat your oven to 350°F (175°C).
2. Cream the butter and sugar until fluffy.
3. Add eggs, then mix in milk and vanilla.
4. Combine flour and baking powder, mixing until smooth.
5. Bake for 25-30 minutes, and let cool.
6. Decorate with edible flowers or colorful icing flowers.
7. Serve and enjoy the beauty!
FAQs:
– Can I use real flowers? Yes, use only edible flowers for safety.
– Can I make it gluten-free? Substitute all-purpose flour with a gluten-free blend.

❥❥ Ofishally one baby birthday costume 1st birthday cake smash outfit decorations kit that comes complete with a nappy cover, a handmade highchair banner, a bow tie and Y-back adjustable suspenders, birthday photo prop supplies 4-in-1.

❥❥ Ofishally one baby birthday costume 1st birthday cake smash outfit decorations kit that comes complete with a nappy cover, a handmade highchair banner, a bow tie and Y-back adjustable suspenders, birthday photo prop supplies 4-in-1.

Color scheme:Designed with a classic, eye-catching red, yellow, blue, and green color palette, this decoration set creates a lively, festive atmosphere that pops in photos! The bold, saturated colors are perfect for capturing precious birthday memories,
8. Superhero Smash Cake

Unleash the hero within with a Superhero Smash Cake! Whether your child loves Spiderman, Batman, or their own favorite, this cake can be customized to match any hero. A sturdy chocolate cake covered in vibrant buttercream makes it ready for a smashing good time!
Ingredients:
– 2 cups all-purpose flour
– 1 ½ cups sugar
– 1 cup unsalted butter
– 4 large eggs
– 1 cup milk
– 2 teaspoons baking powder
– Food coloring for frosting
– Edible superhero decorations
Instructions:
1. Preheat your oven to 350°F (175°C).
2. Cream butter and sugar together until fluffy.
3. Mix in eggs and milk, then add flour and baking powder.
4. Bake for 30-35 minutes and let cool.
5. Frost with colorful buttercream, matching your hero’s theme.
6. Add edible decorations for the finishing touch!
FAQs:
– Can I use different designs? Yes, personalize it with your child’s favorite superhero!
– Can I make it gluten-free? Use a gluten-free flour blend to ensure it’s smashable!

COMMERCIAL GRADE - Premium craft mixture tool that is built for the food service industry, and safe for home use. Perfect for the home chef cooking top desserts with whipped cream or froth on coffee & lattes while entertaining guests! Incredible at making nitro cold brew coffee and mousse!

Ingredients: Dextrose, modified corn starch, phosphate
The deluxe box with window was designed according to the whipper outline. You can see the dispenser through the window clearly
9. Farm Animal Cake

Bring the farm to your celebration with a cute Farm Animal Cake! This design features fluffy frosting shaped like adorable farm animals or a colorful barn. Its sturdy structure ensures it can handle little hands curiously exploring its texture!
Ingredients:
– 2 cups all-purpose flour
– 1 ½ cups sugar
– 1 cup unsalted butter
– 4 large eggs
– 1 cup milk
– 2 teaspoons baking powder
– Edible animal decorations
– Green frosting for grass
Instructions:
1. Preheat your oven to 350°F (175°C).
2. Cream the butter and sugar until fluffy.
3. Add eggs and milk, mixing well.
4. Combine flour and baking powder, then pour into a greased pan.
5. Bake for 30-35 minutes and let cool.
6. Decorate with fluffy frosting animals and green frosting for grass!
FAQs:
– Can I use plastic toys? Yes, just ensure they’re clean and safe.
– Can I make it gluten-free? Substitute all-purpose flour with a gluten-free blend.


Material: Baby boy girls birthday romper made of cotton material, super soft and breathable, comfortable absorbent to wear, friendly to baby's skin, cares for newborns too.1st birthday girl outfit.1st birthday boy outfit

BOYS 1ST BIRTHDAY HAT - Exquisite And Stylish First Birthday Conical Hat Will Add Whimsy And Energy To Any Boy's Celebration And Make His Special Day Full Of Laughter And Precious Memories.
How To Choose The Right Cake Smash Cake
Selecting the perfect cake smash cake for your toddler can feel overwhelming. You want something fun, safe, and durable enough to withstand all the grabbing and squeezing! Here are some key criteria to help you make the best choice.
1. Cake Size
The size of the cake matters. A typical cake smash cake should be small enough for your little one to handle but large enough for a memorable smash! Aim for a cake about 6 to 8 inches in diameter. This size is manageable for tiny hands and allows for plenty of fun without overwhelming your toddler.
2. Ingredients
Look for toddler-friendly ingredients that are safe and delicious. Avoid any allergens your child may have, such as nuts or gluten. Opt for natural sweeteners like honey or maple syrup instead of refined sugar. Additionally, consider using organic ingredients to minimize exposure to pesticides and preservatives. Always check labels and, if possible, make a cake that aligns with your child’s dietary needs.
3. Durability
Choose a cake that can withstand a bit of rough handling. Cakes made with sturdy bases, like pound cake or a denser sponge cake, hold up better during the smash. Avoid overly soft or fragile cakes that could collapse under pressure. A well-constructed cake will not only hold its shape but also provide a delightful sensory experience for your toddler.
4. Fun Themes
Selecting a fun theme can make the cake smash even more memorable! Think about your child’s favorite characters, colors, or interests. Popular themes include dinosaurs, princesses, or animals. A themed cake adds an extra layer of excitement, creating great photo opportunities for you and your family.
5. Decoration
Keep decorations simple and edible. Avoid sharp or hard items that could pose a choking hazard. Whipped cream, frosting swirls, or soft fruits can add a colorful touch without being risky. You might also consider using edible glitter for a fun sparkle, making the cake visually appealing while staying safe for your toddler.
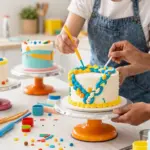
6. Easy DIY Options
If you’re feeling crafty, consider making the cake yourself! There are plenty of easy DIY cake recipes that can be modified to suit your child’s taste and dietary restrictions. Simple recipes, like a vanilla funfetti cake, can be whipped up quickly. Plus, homemade cakes offer a personal touch that store-bought cakes can’t match.
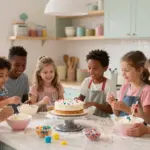
Pro Tip: Before the big day, let your toddler interact with the cake in a controlled environment. This could help them feel more comfortable and excited come smash time. Plus, it gives you a chance to see how well the cake holds up to squishing!
By keeping these factors in mind, you’ll be well on your way to choosing the perfect cake smash cake that your toddler will love! Enjoy the celebration and capture those delightful moments as they dig into their cake!
【Birthday Outfit for 1 Year Old Boy】Baby boy cake smash outfit first birthday, 1st birthday boy gifts, cake smash outfit boy first birthday includes Diaper Cover , Romper and short pant One size fits most. Suitable for birthday baby 1 years. Your baby would receive a lot of compliments and be the most handsome baby on his birthday cake smash party.

PACKAGE – Including 3 pieces baby dinosaur cake toppers, 1 piece volcano decoration, 20 pieces balls cake toppers and 4 pieces green leaves.

CHOKING HAZARD-Small parts. Not for children under 3 years. Material: High quality soft clay, plastic, paper and food grade sticks, safe and non-toxic.
10. Space Adventure Cake

Get ready for a cosmic journey with a Space Adventure Cake! This cake features a rich chocolate base topped with galaxy-colored frosting, sprinkled with edible stars and planets. Its sturdy design is perfect for little hands ready to explore outer space!
Ingredients:
– 2 cups all-purpose flour
– 1 ½ cups sugar
– 1 cup unsalted butter
– 4 large eggs
– 1 cup milk
– 2 teaspoons baking powder
– Dark blue and purple food coloring
– Edible star and planet decorations
Instructions:
1. Preheat your oven to 350°F (175°C).
2. Cream the butter and sugar until fluffy.
3. Mix in eggs and milk, then add flour and baking powder.
4. Bake for 30-35 minutes and let cool.
5. Frost with dark blue and purple icing for a galaxy effect.
6. Decorate with stars and planets for a stellar finish!
FAQs:
– Can I use different colors? Yes, customize the colors to fit your theme!
– Can I make it vegan? Substitute butter and milk for plant-based alternatives.
Space Adventure Cake
Editor’s Choice


11. Magical Unicorn Cake

Bring a touch of enchantment to your celebration with a Magical Unicorn Cake! This whimsical creation features vibrant layers of frosting that mimic a unicorn’s colorful mane. It’s not only visually striking but also designed to withstand the excitement of a smash!
Ingredients:
– 2 cups all-purpose flour
– 1 ½ cups sugar
– 1 cup unsalted butter
– 4 large eggs
– 1 cup milk
– 2 teaspoons baking powder
– Pastel food coloring
– Fondant unicorn horn for decoration
Instructions:
1. Preheat your oven to 350°F (175°C).
2. Cream the butter and sugar until fluffy.
3. Add eggs and milk, then mix in flour and baking powder.
4. Bake for 30-35 minutes and let cool.
5. Frost with pastel colors for a cheerful look.
6. Top with a fondant unicorn horn for an enchanting finish!
FAQs:
– Can I use different colors? Yes, feel free to customize the colors to your liking!
– Can I make it gluten-free? Substitute all-purpose flour with a gluten-free blend.
Magical Unicorn Cake
Editor’s Choice


12. Classic Funfetti Cake

Sometimes, simple is the best choice! A Classic Funfetti Cake is a nostalgic favorite that’s perfectly smashable for little ones. Filled with colorful sprinkles, this cake adds a festive flair to any birthday celebration while being easy to make!
Ingredients:
– 2 cups all-purpose flour
– 1 ½ cups sugar
– 1 cup unsalted butter
– 4 large eggs
– 1 cup milk
– 2 teaspoons baking powder
– Colorful sprinkles
– Buttercream frosting for decoration
Instructions:
1. Preheat your oven to 350°F (175°C).
2. Cream butter and sugar until fluffy.
3. Add eggs and milk, mixing well.
4. Mix flour and baking powder, then fold in sprinkles.
5. Bake for 30-35 minutes and let cool.
6. Frost with buttercream and add more sprinkles on top!
FAQs:
– Can I use different flavors? Absolutely! You can customize the cake flavor as desired.
– Can I make it sugar-free? Substitute sugar with your preferred sweetener for a healthier option.
13. Macaron Wonderland Cake

Elevate your cake smash with a Macaron Wonderland Cake! This stunning cake can feature a vanilla or chocolate base topped with an array of colorful macarons, adding a trendy touch to any celebration. While macarons can be delicate, the cake is sturdy enough for a fun smash!
Ingredients:
– 2 cups all-purpose flour
– 1 ½ cups sugar
– 1 cup unsalted butter
– 4 large eggs
– 1 cup milk
– 2 teaspoons baking powder
– Macarons for decoration
– Colorful frosting for topping
Instructions:
1. Preheat your oven to 350°F (175°C).
2. Cream the butter and sugar until fluffy.
3. Add eggs and milk, then mix in flour and baking powder.
4. Bake for 30-35 minutes and let cool.
5. Top with colorful frosting and add macarons for a stunning look!
FAQs:
– Can I use different flavors of macarons? Yes, customize with your favorite macaron flavors!
– Can I make it gluten-free? Use gluten-free flour for the cake base.
14. Chocolate Peanut Butter Bliss Cake

Is your little one a fan of chocolate and peanut butter? The Chocolate Peanut Butter Bliss Cake is a dreamy combination that’s hard to resist! This dense chocolate cake layered with creamy peanut butter frosting is sturdy and delicious, perfect for a smashing good time!
Ingredients:
– 2 cups all-purpose flour
– 1 ½ cups sugar
– 1 cup unsalted butter
– 4 large eggs
– 1 cup milk
– 2 teaspoons baking powder
– 1 cup creamy peanut butter
– Chocolate chips for added texture
Instructions:
1. Preheat your oven to 350°F (175°C).
2. Cream the butter and sugar until fluffy.
3. Add eggs and milk, mixing well.
4. Combine flour, baking powder, and chocolate chips.
5. Bake for 30-35 minutes and let cool.
6. Layer the cake with peanut butter frosting and drizzle with chocolate on top!
FAQs:
– Can I use crunchy peanut butter? Yes, that will add a delightful texture!
– Can I make it nut-free? Substitute peanut butter with a nut-free alternative like sunflower seed butter.
Chocolate Peanut Butter Bliss Cake is a smash-worthy favorite for little giggles and messy hugs. Build it dense and sturdy with a creamy peanut butter frosting so the smash stays intact, not crumbles. Perfect for cake smash cakes that turn chaos into delighted memories.
Chocolate Peanut Butter Bliss Cake
Editor’s Choice


15. Sweet Treats Stack Cake

Create a show-stopping Sweet Treats Stack Cake that’s sure to impress! This design features layers of mini cakes stacked on top of each other, offering a variety of flavors and textures for a unique smash experience. The multiple layers make it a fun centerpiece at any party!
Ingredients:
– 6 mini cake mixes (chocolate, vanilla, lemon)
– 1 ½ cups sugar
– 1 cup unsalted butter
– 4 large eggs
– 1 cup milk
– Sturdy frosting (fondant or buttercream)
– Colorful sprinkles for decoration
Instructions:
1. Preheat your oven to 350°F (175°C).
2. Prepare mini cake pans with batter from different cake mixes.
3. Bake according to package instructions and let cool.
4. Stack the mini cakes, securing with sturdy frosting between layers.
5. Decorate each layer with colorful sprinkles for a festive touch!
FAQs:
– Can I use different flavors? Yes, mix and match flavors for a fun variety!
– Can I make it gluten-free? Use gluten-free cake mixes for all layers.
Conclusion

Choosing the right cake for a cake smash can be both fun and artistic! These cake smash cakes are designed to endure the excitement that toddlers bring to the table, ensuring every celebration is filled with laughter and joy.
From rainbow delights to chocolate mud puddles, the options are endless and each one offers a unique adventure for little hands. We hope these ideas inspire you to create memorable moments that you and your little one will cherish for years to come.
Note: We aim to provide accurate product links, but some may occasionally expire or become unavailable. If this happens, please search directly on Amazon for the product or a suitable alternative.
This post contains Amazon affiliate links, meaning we may earn a small commission if you purchase through our links, at no extra cost to you.
Frequently Asked Questions
What exactly are cake smash cakes and why should you consider durable designs for toddlers?
Cake smash cakes are playful, toddler-sized cakes designed for a photo-worthy moment when a birthday kid digs in, grabs, and squeezes the cake.
Durable cake designs matter because little hands can be unexpectedly rough, and a sturdy base with stable decorations helps the cake hold its shape for those adorable moments. Look for toddler-friendly cakes that use crusted buttercream, sturdy edible props, and simple, bold themes so the look stays intact even after a few squeezes.
When planning, consider cake smash ideas that emphasize durability and safety, and keep the focus on fun rather than mess control.
How can I make toddler-friendly cake smash props that survive being grabbed and squeezed?
Start with props that are both delicious and durable. Use modeling chocolate or gum paste for larger edible toppers, and attach them with strong royal icing so they don’t topple during a grab.
Choose props that are chunky, not tiny or loose, to reduce choking risks and keep everything firmly in place. Use a thick fondant or edible wafer-paper wrap around the cake edge to protect the frosting a bit longer.
Additionally, combine edible props with a solid buttercream crust and a flat, stable base so the cake can endure enthusiastic toddler hugs while still looking great for photos.
What are some easy DIY cake recipes that hold up well for a cake smash?
Aim for a crusted buttercream finish and a sturdy cake that travels well. A simple vanilla or chocolate cake with a thick buttercream crumb coat holds its shape better than a very soft finish.
Tips: bake with evenly cooled layers, level the tops, add dowels or a cardboard support between layers, and chill the cake before decorating. Use a simple, crowd-pleasing recipe and finish with a durable cake design—think fondant accents or robust sugar-paste toppers—that won’t crumble under a real smash.
How should I choose fun cake themes that work great for cake smash ideas while staying toddler-friendly?
Pick themes with bold shapes and high-contrast colors that photograph well and hide small smudges. Popular fun cake themes include animals, space, under-the-sea, and farmyard scenes, but you can tailor them to your kid’s interests.
Keep decorations large enough to withstand grabs, and avoid tiny edible decorations that could become hazards. A theme that combines a sturdy cake design with big, playful elements tends to deliver both great photos and fewer worries about mess.
How can I store, transport, and set up cake smash cakes to survive the smash moment and stay fresh?
Plan for a smooth setup: transport the cake in a non-slip box with a sturdy base and a cake board, and keep it cool to preserve the frosting’s texture.
At the venue, set up on a flat table with a protective mat and lay out the edible props and toppers so they’re ready to go. If you’re making multiple components, assemble them just before the smash to keep textures intact. And don’t forget to have a quick wipe-down option handy—messy moments are part of the fun, but a tidy setup helps the photos shine.
Related Topics
cake smash cakes
toddler-friendly cakes
durable cake designs
fun cake themes
easy DIY cake recipes
cake smash ideas
mess-friendly desserts
family-friendly treats
colorful cake designs
themed cake decor
simple cake tutorials
celebration cakes