Planning a cake smash birthday party for your little one can feel like a whirlwind of fun and chaos. You want everything to be just right, from the cake to the decorations. As a busy parent, you might find yourself craving quick solutions that don’t sacrifice creativity. That’s why I made this post! I want to help you find the perfect cake smash backdrop that not only looks fantastic but also sets up in under 10 minutes.
If you’re someone who loves capturing those precious milestones in your child’s life, this guide is for you. Whether you’re a seasoned photographer or a first-time party planner, you’ll appreciate these quick and easy backdrop ideas. Each suggestion is designed to turn your little one’s cake-smashing moment into a memory you’ll cherish forever. You’ll get a variety of creative options, so you can find the one that fits your theme and style.
In this post, I’ve pulled together 12 cake smash backdrop ideas that are fun, colorful, and perfect for busy parents like you. No more scrambling to put together a backdrop at the last minute! With just a few supplies and some simple steps, you’ll have a stunning setup ready for those adorable photos. Let’s dive in and make your cake smash unforgettable!
Key Takeaways
– You can set up a beautiful cake smash backdrop in under 10 minutes, saving you time and stress.
– Each backdrop idea is designed to suit different themes, ensuring a perfect fit for your child’s personality.
– Quick setup options include colorful decorations like balloon arches and paper pom poms, making it easy to create a festive atmosphere.
– Use simple materials like fabric and streamers to create a stunning effect without breaking the bank or requiring advanced crafting skills.
– Capturing those special moments with the right backdrop can elevate your child’s cake smash photography, giving you memories you’ll cherish for years.
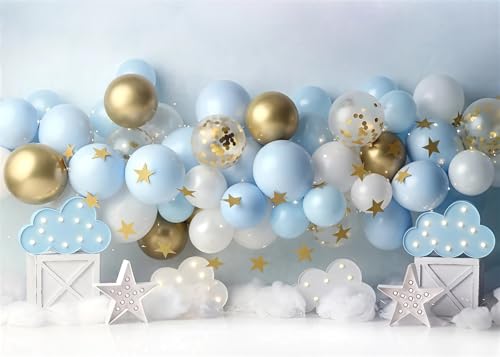
1. Balloon Arch Extravaganza

Imagine your child’s cake smash surrounded by a stunning balloon arch! This vibrant display brings life to the party, making for unforgettable photos. You can create a colorful array with different balloon sizes and shades, all set up in under 10 minutes using a simple balloon tape strip. Customize the colors to match the party theme for an extra special touch!
Start by mixing helium and air-filled balloons for a rich look. Make sure to anchor the arch with weights if you’re outside. Add some greenery or flowers to enhance its charm further.
Key steps to create your balloon arch:
– Choose a variety of colors for a fun effect
– Secure balloons tightly to prevent slipping
– Incorporate decorative elements like ribbons or foliage
Your little one will shine against this joyful backdrop, and it will elevate the entire celebration atmosphere!

【COMPLETE PARTY PACKAGE】: Balloons arch kit package includes 15 folded glass fiber pole, 2 PVC Base, 2 PVC pipe, 2 water(sand) fillable bag, 1 manual pump, 50 balloon clips, 2 balloon knotter, 2 ground secure ropes, 4 ground nails. It will enough for all party decoration you need.

【Super Value Pastel Balloon Arch Kit】This kit includes 126 pastel balloons in various sizes: 18", 12", and 5". The balloons come in six elegant macaron hues: pastel pink, pastel blue, pastel green, pastel yellow, pastel orange, and pastel purple. Additionally, the kit contains a 16ft strip, and 100 adhesive dots. This pastel balloon arch is ideal for first birthday decorations, Easter parties, gender reveal celebrations, and so on.
Balloon Arch Extravaganza
Editor’s Choice


2. Streamer Backdrop Delight

Streamers can transform any space into a festive paradise in no time! Hang colorful streamers from a wall or a DIY frame for a delightful cascading look. Opt for colors that fit your theme, whether soft pastels or bold hues, and watch your photos come to life. Plus, this option is budget-friendly and quick to assemble!
To secure the streamers, use tape or adhesive hooks at the top and let them fall freely. Mixing various lengths creates a layered effect that looks stunning. You can also coordinate streamers with your toddler’s accessories for a cohesive look.
Ideas for your streamer setup:
– Choose a color palette that matches the cake
– Experiment with different lengths for visual interest
– Add matching party hats for extra flair
This festive backdrop will create a vibrant atmosphere, making it the ideal stage for your little one’s cake-smashing fun!
Streamer Backdrop Delight
Editor’s Choice


3. Themed Party Props

Enhance your cake smash backdrop by incorporating themed props that reflect your child’s interests! Whether it’s their favorite cartoon or hobby, these fun decorations can be gathered quickly. From toys to banners, these elements create a lively atmosphere that will capture the essence of the celebration in moments.
Consider themes that resonate with your child, and gather corresponding decor to bring the scene to life. Props not only engage your toddler but also add a narrative to your photos, making them memorable experiences.
Fun theme suggestions:
– Under the Sea: Use inflatable fish and shells
– Jungle Safari: Scatter stuffed animals and greenery
– Space Adventure: Include stars and rocket shapes
Your little one will love interacting with these props, creating unique visuals that tell a delightful story through your photos!

【Size】: 7x5FT(WxH) / 2.1m x 1.5m / 82 inch x 59 inch, Horizontal Style. Clips and stand are not included . Without grommets or pole pockets.
[Size] 5x3ft/1.5x1m (1.5m width, 1m height).

✤ Find the perfect look for your baby's 1st birthday photo prop and celebrate your baby's 1 year old birthday at a cartoon mouse themed birthday party. This adorable cartoon mouse 1st birthday cake smash outfit is your second to none choice.
4. Fabric Backdrops

Fabric backdrops are a timeless choice that can significantly enhance your cake smash setup. Use a large, patterned fabric to create a beautiful backdrop that complements your cake perfectly. Choose cheerful designs like polka dots or stripes, or opt for a solid color that highlights the cake’s features.
For easy setup, use a command hook to drape the fabric or attach it to a wall. Layer sheer fabrics for added dimension, and select lightweight materials for hassle-free handling.
Quick tips for your fabric backdrop:
– Choose patterns that reflect your child’s personality
– Drape fabric for a soft, elegant look
– Match colors with the cake for a harmonious vibe
This option not only looks great but also allows for plenty of creative expression, making it easy to capture your child’s joyful moments!

Size&Package: 7x5ft/210cm(Width)x150cm(Height) Seamless. Only 1pcs 5th birthday backdrop for girls, clips or hooks not included

LARGE SIZE BANNER: This banner measures approx 1800mm*1200mm/70.87in*47.24in.There are long ropes on the four corners of the banner, you can use it to fix the banner conveniently.

Material & Package: The girls 1st birthday pink backdrop is made of high-quality new upgraded Vinyl, excellent in color, and easy to hang and carry. No reflective. Only 1pc banner. No stand, and No clip
Fabric Backdrops
Editor’s Choice


5. Nature-Inspired Backdrop

For a more organic vibe, consider a nature-inspired backdrop with elements from your own garden or local park. Fresh flowers, lush leaves, or a lovely picnic blanket can create a serene and beautiful setting for your cake smash. This style works wonders for outdoor sessions and can be set up quickly with just a few natural items.
Gathering elements from nature is simple and adds a touch of tranquility to your photos. You can create a wonderful atmosphere that feels personal and inviting.
Ideas for incorporating nature:
– Use a floral tablecloth as a base
– Scatter wildflowers in small vases for charm
– Integrate natural textures like wooden crates
Your toddler will feel at ease in this lovely backdrop, and the resulting photos will capture the enchanting beauty of the moment!
6. Color-Block Background

Color-blocking is a trendy way to create an eye-catching backdrop with minimal effort! Use large sheets of colored paper or fabric in bold shades to achieve a modern look. Arrange them in a fun, asymmetric pattern for a striking visual that stands out in photos.
Select three to five colors that work well together, and secure them to a wall with tape or adhesive for quick and easy setup. Mixing textures with smooth surfaces adds visual interest and depth.
Quick tips for color-blocking:
– Choose complementary colors for a cohesive look
– Secure carefully to ensure they stay in place
– Experiment with textures for an engaging backdrop
This contemporary backdrop will elevate your cake smash session, and cleanup afterward is a breeze!

Vibrant & Eye-Catching: Transform your space with our stunning pastel pom poms, perfect for any festive occasion.

12 pcs mint tissue pom poms, each measure 12" in diameter

Vibrant Rainbow Party Decor - Instantly elevate your celebration with these stunning paper pom poms. Perfect for birthdays, fiesta-themed parties, or anniversaries. Whether you're creating a dazzling photo backdrop, eye-catching centerpieces, or festive ceiling hangings, these rainbow-colored tissue flowers add an unforgettable pop of color to any indoor or outdoor event.
7. Fairy Lights Magic

Bring a touch of magic to your cake smash with the twinkle of fairy lights! These enchanting lights can instantly transform your backdrop into a dreamy setting. Drape them over a wall or around the cake table for a soft, warm glow that enhances the atmosphere of your photos.
Using battery-operated lights makes placement hassle-free, and you can choose between warm white or colorful options to set the mood. Feel free to combine them with other decor elements like flowers for added charm.
Tips for using fairy lights:
– Position the lights evenly for a balanced look
– Pair with other decorations for a cohesive theme
– Use warm lights for a cozy ambiance
Your toddler’s cake smash will sparkle against this magical backdrop, capturing precious moments beautifully!
Fun fact: Battery-operated fairy lights cut setup time for a cake smash backdrop by up to 50% and add a dreamy glow. Drape them around the cake table for a warm, magical scene that elevates photos—and keeps mom straightening only after cake time.
Fairy Lights Magic
Editor’s Choice


Difficulty Rating & Requirements
Overall Difficulty Rating: Easy
Setting up a cake smash backdrop is quite straightforward. Most ideas require minimal crafting skills and can be achieved by anyone, including busy parents who may not have much experience. If you’re looking for a quick and fun way to make your child’s photography session special, these projects are designed for you!
Time Estimate:
⏱ Estimated time: 10-30 minutes per backdrop. Depending on the complexity of the design, you can expect to spend:
– 5-10 minutes gathering supplies
– 10-20 minutes setting up the backdrop
– 5 minutes for adjustments and final touches
Skill Requirements:
– Required skills: Basic crafting, arranging, and decorating
– Beginner-friendly: Yes. Each backdrop idea involves simple steps that anyone can follow, even with limited crafting experience.
– Skills that can be learned: You can easily learn how to arrange decorations or hang items securely. No prior experience is necessary for most setups.
Tools & Materials Needed:
🧰 Essential items checklist:
– Backdrop stand or wall space (required)
– Balloons or streamers (required)
– Tape or push pins (required)
– Scissors (required)
– String lights (optional, for added effect)
– Themed props (optional, depending on the theme)
– Fabric or paper for backdrops (required)
– Chalkboard or poster board (optional for writing messages)
Step-by-Step Overview:
1. Gather Supplies (5-10 minutes): Collect all necessary materials. If you’re choosing a themed backdrop, make sure to have related props ready.
2. Set Up the Backdrop (10-20 minutes): Depending on your choice, hang balloons, arrange streamers, or set up your fabric. Secure everything well using tape or push pins so it looks neat.
3. Add Decorations (5-10 minutes): If you’re using props or string lights, incorporate them to enhance the backdrop. This is where you can get creative!
4. Final Adjustments (5 minutes): Step back to assess how everything looks. Adjust any items that may need to be repositioned before the photography session begins.
Cost Comparison: Professional vs DIY:
Hiring a professional photographer with an elaborate backdrop can range from $300 to $800, depending on the quality and experience of the photographer. However, setting up your own cake smash backdrop can cost as little as $30 to $100, depending on the materials you choose. This makes DIY an attractive option for those looking to save money while capturing lasting memories. Plus, you have the freedom to customize the backdrop to suit your child’s personality and theme!

SIZE:9ftx6ft (2.7M in width x 1.8M in height), Can meet about 6 children to take a group photo, Item send by folded

✪ 【Size&Package】:7ftx5ft (2.1m width x 1.5m height),1PCS JNewborn Birthday Baby Shower Party Decoration Photography Backdrop;In order to facilitate transport and packaging, item sente by folded and send.

Size&Color: 7x5ft/(210cmx150cm), with 1cm white borders on both sides for easy framing and secure mounting.
8. Paper Pom Poms and Garlands

Create a playful atmosphere with paper pom poms and garlands! These fun decorations can be quickly hung from ceilings or walls, providing a whimsical backdrop for your cake smash. Pick a mix of colors that complement each other and coordinate with the cake design for a cohesive feel.
Hanging pom poms at various heights adds depth and interest to your setup. Combine them with garlands for an extra layer of texture and charm, and use clear string for a floating effect.
Setup suggestions:
– Vary heights for a dynamic look
– Combine with garlands for added texture
– Use clear fishing line for a magical touch
This cheerful backdrop will perfectly capture the joy of your little one’s special day!

COMPLETE PARTY DECORATIONS: This set includes a monster truck balloon arch kit, composed of 1 truck foil balloon, 4 checkered balloons, 1 SMASH foil balloons set, 103 red blue and black latex balloons with different sizes, 1 monster truck backdrop, 1 happy birthday banner, 1 monster truck banner, 1 monster truck tablecloth, 1 cake topper and 12 cupcake toppers

PACKAGE INCLUDES: 126 pcs blue balloon arch garland kit includes 6pcs 18" balloons, 60pcs 10" balloons, 60pcs 5" balloons, 1pc balloon chain and glue point. You can put together this dusty blue balloon garland that makes a wonderful statement piece

PACKAGE INCLUDES: 126pcs light pink balloon arch garland kit in 5 sweet colors: macaroon pink, double stuffed nude, sand white, gold and clear. Balloon Sizes & Quantities: 3pcsx18" balloons, 23pcs x12" balloons, 55pcs x10" balloons, 45pcs x 5" balloons, 1pc x balloon chain and glue point. put together these light pink balloons that make a wonderful statement piece
9. Chalkboard Backdrop

Opt for a fun and rustic vibe with a chalkboard backdrop! This versatile option allows you to personalize it with messages or drawings, making it a unique addition to your cake smash. All you need is a large piece of black construction paper or a chalkboard, along with colorful chalk for designs.
Customizing a chalkboard backdrop is simple and adds a personal touch to your photos. Just lean or hang the board in place for an easy setup that fits any style.
Benefits of a chalkboard backdrop:
– Easily customizable to fit your theme
– Merges art with photography for unique flair
– Setup is quick and straightforward
Your cake smash photos will shine with this creative backdrop, reflecting your child’s personality while keeping the process stress-free!

Complete Decoration Set: The 20-piece decoration kit from EPIQUEONE provides everything needed for stunning party decor. With tissue paper pom poms in White, Ivory, Peach, and Champagne, it transforms any space into a floral party decor

【Package Contents】 The macaron tissue flower ball set includes 3*10-inch purple tissue flower balls, 1*10-inch pink, 2*10-inch light blue, 2*10-inch flesh-colored, 1*light green tissue flower balls, 1*10-inch yellow, 2*8-inch pink, 1* light blue, 1* flesh-colored, 1* yellow, 1* light green tissue flower balls, and a 10-foot garland, 40*2-inch dots
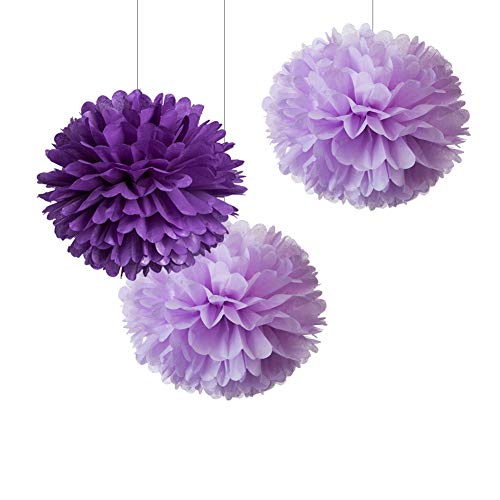
12 pcs purple and lilac tissue pom poms, each measure 12" in diameter
10. Simple Solid Color Background

Sometimes, simplicity is best! A solid color backdrop is elegant and can be set up in just under 10 minutes. Choose a color that either complements or contrasts with your cake for a clean, striking aesthetic. This approach ensures that the focus remains on your child’s cake-smashing adventure and their joyful expressions.
For a smooth finish, use a large piece of fabric or a vinyl backdrop. Pair this backdrop with matching or contrasting decorations at the cake table for added visual appeal. Make sure the color is vibrant to enhance the festive atmosphere.
Execution tips for a solid backdrop:
– Use high-quality fabric for a polished look
– Coordinate decorations for a unified theme
– Ensure the backdrop is securely fastened
This minimalistic setup can create stunning results, beautifully showcasing the happiness of the moment!
Did you know a solid color cake smash backdrop can be set in under 10 minutes and still look stunning? Simplicity helps focus on your child’s joyful expressions, not the setup. Grab a large fabric or vinyl, pick a color that pops with your cake.
11. DIY Picture Frame Setup

Create a distinctive backdrop with a DIY picture frame setup! Repurpose an old frame by painting it in fun colors or omitting the glass for a rustic appearance. Hang it behind your cake table or hold it as your little one enjoys their cake for a charming artistic touch.
Personalizing the frame with stickers, drawings, or themed decor adds character and creativity. You can even hang additional decorations within or around the frame for extra charm and visual interest.
Creative ideas for your frame setup:
– Add stickers or drawings to personalize
– Hang other decorations for a layered look
– This setup sparks conversation and creativity
Your toddler will be the star of this artistic backdrop, making every photo a cherished memory!
12. Confetti Explosion Backdrop

Infuse excitement into your cake smash with a confetti explosion backdrop! Scatter large, colorful confetti across a backdrop or pin it to a wall for an instant celebration vibe. The vibrant colors will pop in photos, creating a joyful atmosphere that brightens every moment.
Setting up this backdrop takes only a few minutes, and you can even get creative with confetti shapes and sizes. Pair it with a confetti-themed cake for a cohesive look.
Setup hints for your confetti backdrop:
– Use a mix of large and tiny pieces for texture
– Secure with double-sided tape for a tidy setup
– Coordinate with the cake design for added fun
This cheerful backdrop will undoubtedly bring laughter and joy to your event, creating lasting memories of your little one’s special day!
Fun fact: A simple confetti explosion backdrop can boost photo energy by making colors pop, even in under 10 minutes. Pair it with a confetti-themed cake for a cohesive look, and your cake smash backdrop will shine in every shot.
Confetti Explosion Backdrop
Editor’s Choice


Conclusion

Creating the perfect cake smash backdrop doesn’t have to be daunting. With these 12 quick and easy ideas, you can set up a colorful, engaging space in less than 10 minutes, allowing you to focus on capturing those priceless moments of joy. Whether you opt for a fun balloon arch or a charming nature-inspired backdrop, your little one’s cake smash will be a delightful celebration filled with laughter and happiness. Which idea will you try for your next cake smash?
Note: We aim to provide accurate product links, but some may occasionally expire or become unavailable. If this happens, please search directly on Amazon for the product or a suitable alternative.
This post contains Amazon affiliate links, meaning we may earn a small commission if you purchase through our links, at no extra cost to you.
Frequently Asked Questions
What is a cake smash backdrop and why is it great to set up in under 10 minutes?
A cake smash backdrop is the photo-friendly background that frames your child’s cake smash moment in cake smash photography. Setting one up in under 10 minutes keeps things simple for busy parents while still delivering a polished look. Quick-start tips: choose a cohesive color palette for DIY party decor, hang a simple focal element like a printable banner or balloon garland against a plain wall, attach fabric or streamers with tape, and place a cake on a clean surface in front. Keep props minimal to let your little star shine.
What are some quick cake smash backdrop ideas I can pull off in minutes for busy parents?
Here are fast ideas you can try today: 1) a solid color fabric backdrop with a bold balloon arch; 2) tissue-paper pom-poms or paper fans taped to the wall; 3) a simple balloon garland with a printable banner; 4) a chalkboard panel or painted sheet as a feature; 5) a confetti wall created with oversized dot stickers on craft paper. For each idea, you only need tape, scissors, and a few props to get a cohesive look. Hang the backdrop at eye level, place a simple cake table in front, and shoot with natural light for best results.
How can I customize a cake smash backdrop to fit my child’s theme without buying a lot of extras?
Start with a color palette that matches your party theme, then add one or two personalized touches like a printed name banner or age sign. Bring in a small prop your child loves (favorite plush, hat, or crown) and keep other décor minimal so cake smash photography remains clear. You can also use a solid backdrop in your chosen color and print a photo-themed banner that ties to children’s photography themes without clutter.
What materials do I need for a DIY cake smash backdrop that’s easy to set up?
Essential items include a solid backdrop (fabric, sheet, or paper), painter’s tape or removable adhesive, a garland or a few balloons, a sturdy surface for the cake, and a simple sign or banner for focal interest. Optional extras: a backdrop stand to make setup even quicker, scissors, and double-sided tape. All are inexpensive and align with easy setup backdrops and DIY party decor goals.
How can I photograph my cake smash against a simple backdrop to get great cake smash photography shots?
Choose a well-lit space with plenty of natural light, shoot from your child’s eye level, and keep the background uncluttered. Use a fast shutter speed to freeze the smash and capture a mix of wide shots and close-ups that showcase the cake and expressions. A clean cake smash backdrop helps the subject pop, making your cake smash photography shine while staying quick and easy for busy parents.
Related Topics
cake smash backdrop
quick backdrop ideas
easy setup backdrops
DIY party decor
children's photography
parenting hacks
photo session tips
minimalist decor
under 10 minutes
birthday themes
budget-friendly decor
creative photography